When most of us think about the Trapezius muscle, we envision the bulky muscle that runs from the base of the skull to the top of our shoulders. Or we know it as the muscle responsible for shoulder shrugs. Although these statements are true, they are only describing the “upper” traps. There is a middle and lower section that exists, with its origin being in the lower back, just above the lumbar spine at T12. All 3 sections of the traps are at risk for injury, given our tech and lifestyle related postural issues. However, 90% of trap exercises that I see at the gym only target the upper traps. This leads to a muscular imbalance, and a higher incidence of injury to the middle and lower sections of the traps. The trap 3 exercise, popularized by Charles Poliquin, is a great pinpoint exercise that targets the imbalance between upper and lower traps. This article from poliquingroup.com describes everything you need to know about the Trap 3 exercise.
Train The Trap 3 Raise For Pain-Free Shoulders

The shoulder joint is a wonder of human physiology. It allows your arm to move in almost any direction. Unfortunately, this incredible range of motion comes at a cost: Your supporting muscles need to be strong enough to stabilize the shoulder joint. One way to protect your shoulders is to perform the Trap 3 Raise that strengthens the lower trapezius muscle. The other is to target the rotator cuff with internal and external rotation. We teach both in our PICP Level 1 Certification Course.
This article will cover the technique and benefits of the Trap 3 Raise.
BENEFITS OF THE TRAP 3 RAISE
The trapezius muscle is made up of a pair of large triangular muscles extending over the back of the neck and shoulders down to the middle of your back. It is responsible for posture and movement of the neck and shoulders.
Many people have overdeveloped upper traps but weaker lower traps (often referred to as the trap 3). Upper traps are huge stabilizer muscles, and they get a lot of work in presses, shoulder shrugs, heavy carries, and pulling exercises, often at the expense of the lower traps. Throw in the rounded head posture many people have from looking at their devices, and you get a poorly developed trap 3 area. Why is this a problem?
Weak lower traps lead to poor posture and risk of injury in the shoulders. When you have a weak trap 3 relative to the upper traps, your shoulder blades do not have the support systems they need to properly do what they are meant to do.
Enter the Trap 3 Raise.
HOW TO PERFORM THE TRAP 3 RAISE
Popularized by Charles Poliquin to strengthen the lower part of the trapezius muscle, the trap 3 raise is a great way to isolate and strengthen the lower traps. All you need is a dumbbell and a bench, and it’s helpful if you can check your ego at the door. Because the trap 3 raise is an isolated movement that is targeting a weakness, it’s critical that you don’t overshoot and use a heavy dumbbell. Doing so will turn this into a deltoid front raise and put your rotator cuff at risk of injury.
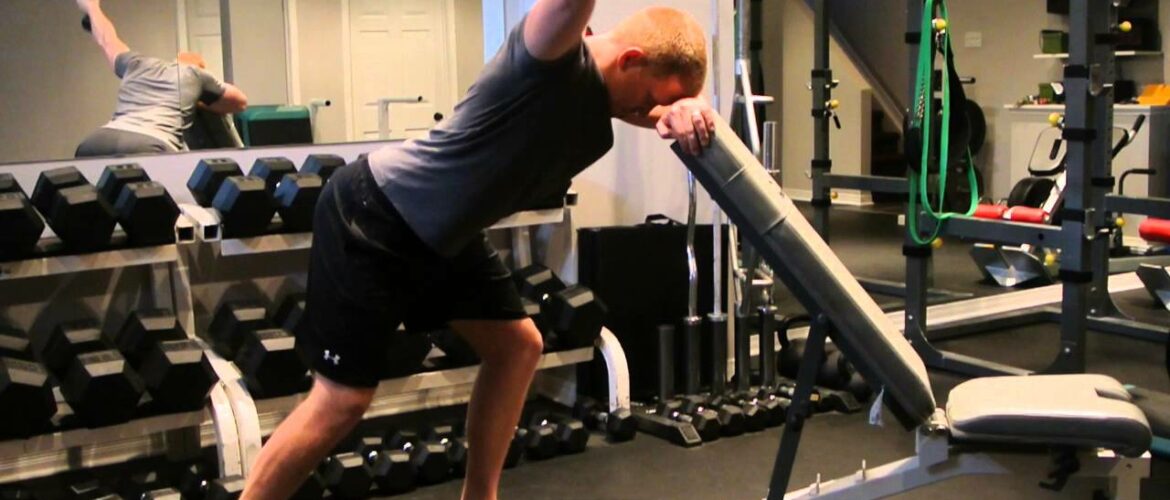
STARTING POSITION SET UP
Set a bench in an upright position. This is the surface to rest your forearm and head.
Set up with your forearm resting against the back of the upright bench. Rest your head against your forearm in a parallel torso position to the floor with your spine flat.
Using a light dumbbell, let the arm hang straight down.
With a straight arm, set the shoulder. This means retracting the scapula and pulling the back tight. The dumbbell should move away from the floor vertically, before you even start the rep.
TRAP 3 MOTION
Raise the weight up and outward slightly so that it is in line with your ear.
The weight should come up powerfully but under control on a 1-second count. Lower the weight on a 4 count.
Repeat by resetting the shoulder on each rep.
Start with a light weight—5 to 8 pounds is appropriate for most trainees. Reps can be in the 15 to 20 range to begin with. As you master the technique, you can increase the weight slightly to match a 12 to 15 rep range.
TAKE AWAYS
Always reset the shoulder on each rep, bringing the shoulder blades together in the back.
Keep your arm locked throughout the motion, which should be smooth and other control.
Technique is paramount on the trap 3 raise. It’s much more effective to train the trap 3 correctly with lighter loads and higher reps than to go too heavy and have your form break down into a poor variation of a shoulder raise.
By optimizing shoulder health, you’ll lay the groundwork for building strong, powerful shoulders.